Your supplies and your prep time pick the idea here: a garland costs almost nothing, a string-wrapped pumpkin balloon takes only balloons, string and glue, and a creepy circus doorway asks for the most effort of any door on the list.
A teacher short on time can hang a line of paper ghosts, while one who likes a project can build 3D decorations that fill a corner of the room.
Decide how much time you have before you decide how much to spend.
1. Paper Mache Pumpkins
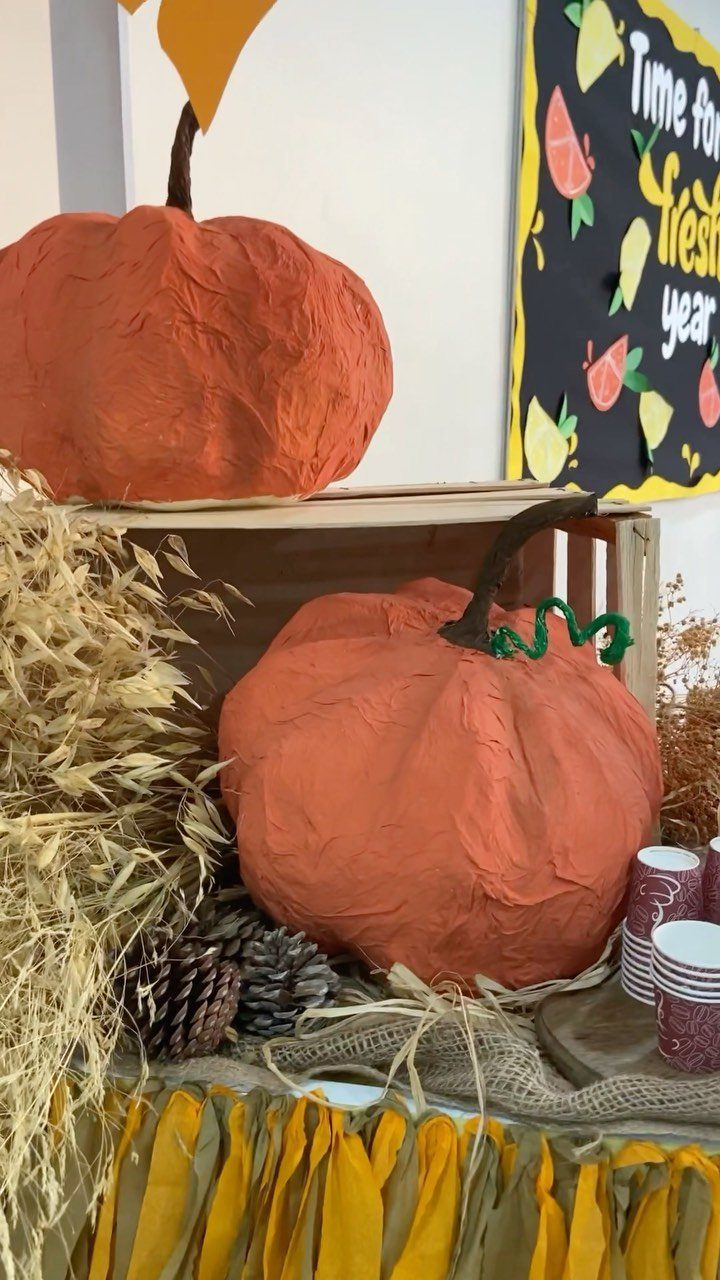
For a pumpkin that looks handmade without costing much, paper mache is hard to beat: newspaper, flour paste and a balloon or a crumpled-paper form are all it takes.
Paint it orange and the surface keeps small ridges that read as pumpkin skin.
Set a pair on a crate with straw, pinecones or dried wheat for a fall corner that works for Halloween and carries through November. Let each coat dry fully before painting, or the shape sags.
2. Pumpkin Patch Corner
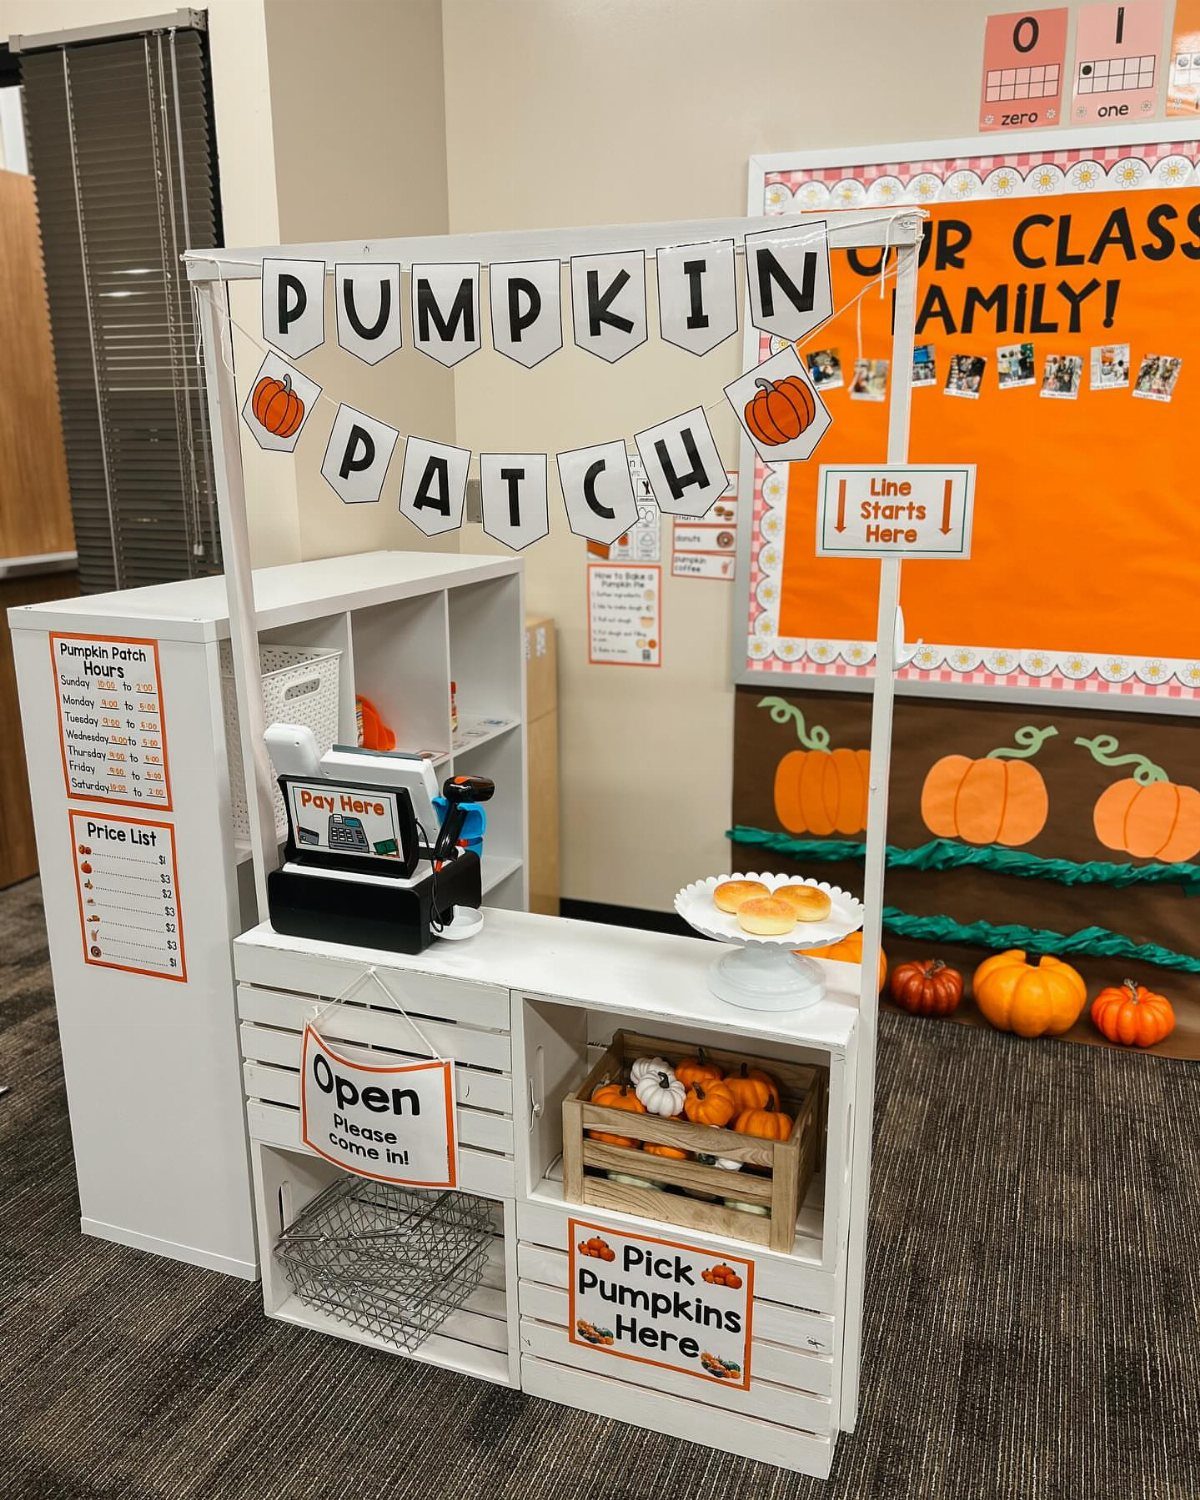
A toy register and a small stand turn a bare corner into a pumpkin stand where kids can play shopkeeper. If the school already owns a play store, the cost is a banner and a few small pumpkins.
I like the "Open" and "Pick Pumpkins Here" signs most.
They give young students words to read and a reason to take turns. Put the corner near a wall so the banner has a place to hang.
3. Garlands
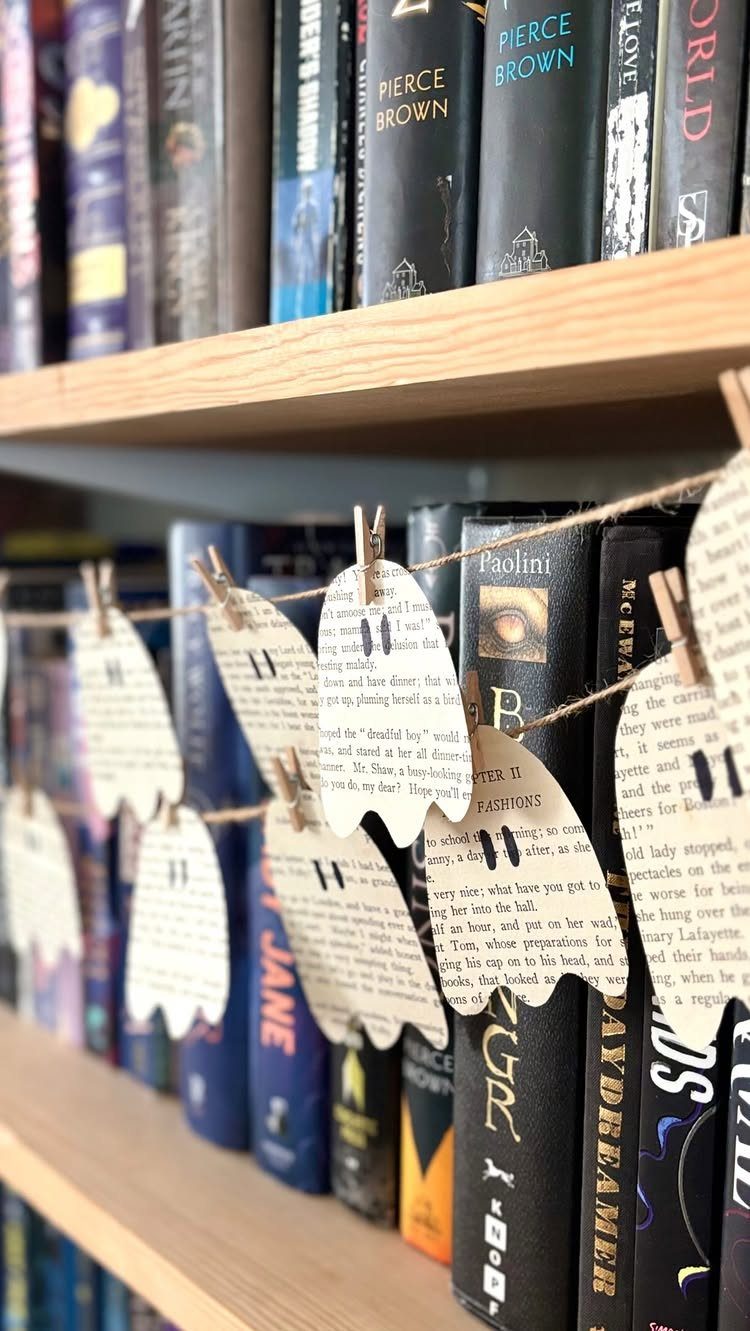
Old book pages cut into ghost shapes make a garland that costs almost nothing, and a discarded paperback or a worn library discard supplies plenty of paper.
Pin each ghost to a length of twine with a clothespin, and you can add, remove or rearrange shapes at any point without touching tape.
A line strung along a bookshelf works well, especially if the ghosts carry book titles or words, since the text blends in with the spines behind them. Students can cut their own, which makes it a quick center activity.
4. Spider Webs
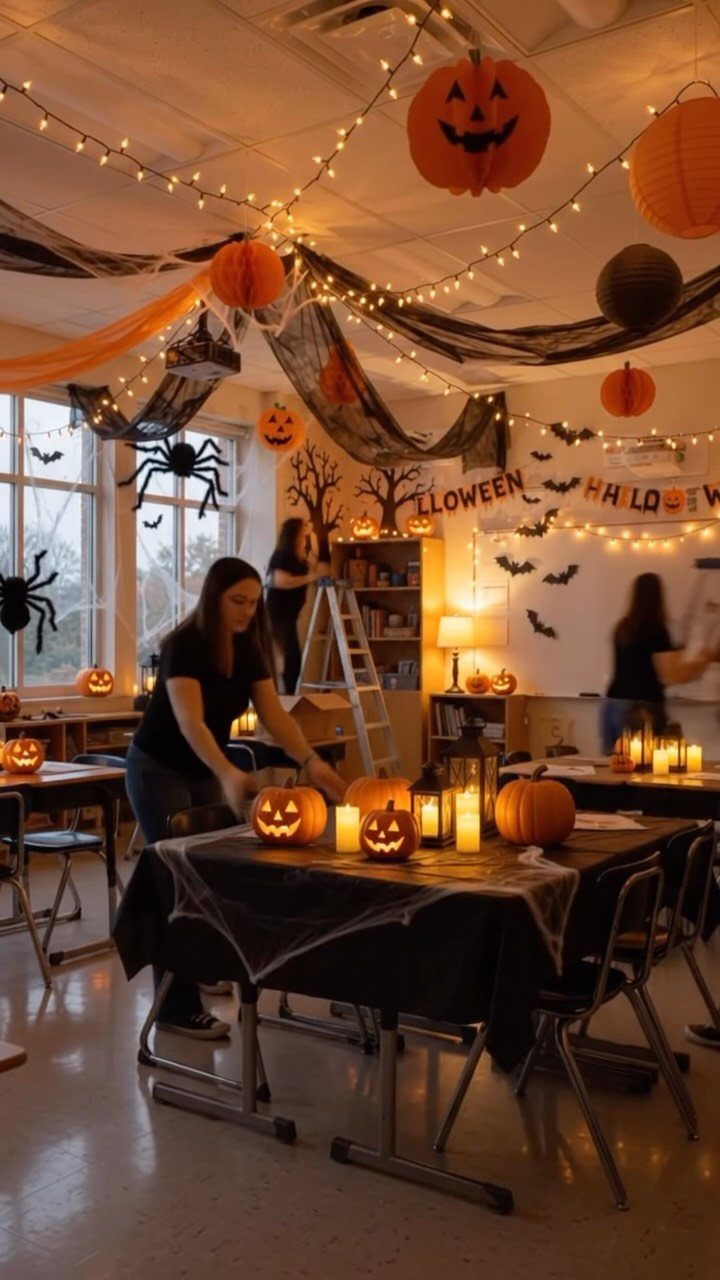
Stretchy fake webbing is the classic spooky layer, and it does the most work stretched over corners, shelf edges and the tops of pumpkins. Pull it thin; a thick wad looks like cotton.
Add string lights on a table and a banner, and a plain room gets a haunted look quickly.
Setup for a web can be quick, but plan extra time for any add-ons like spiders, since those take longer than the web itself.
5. Hanging Ghosts
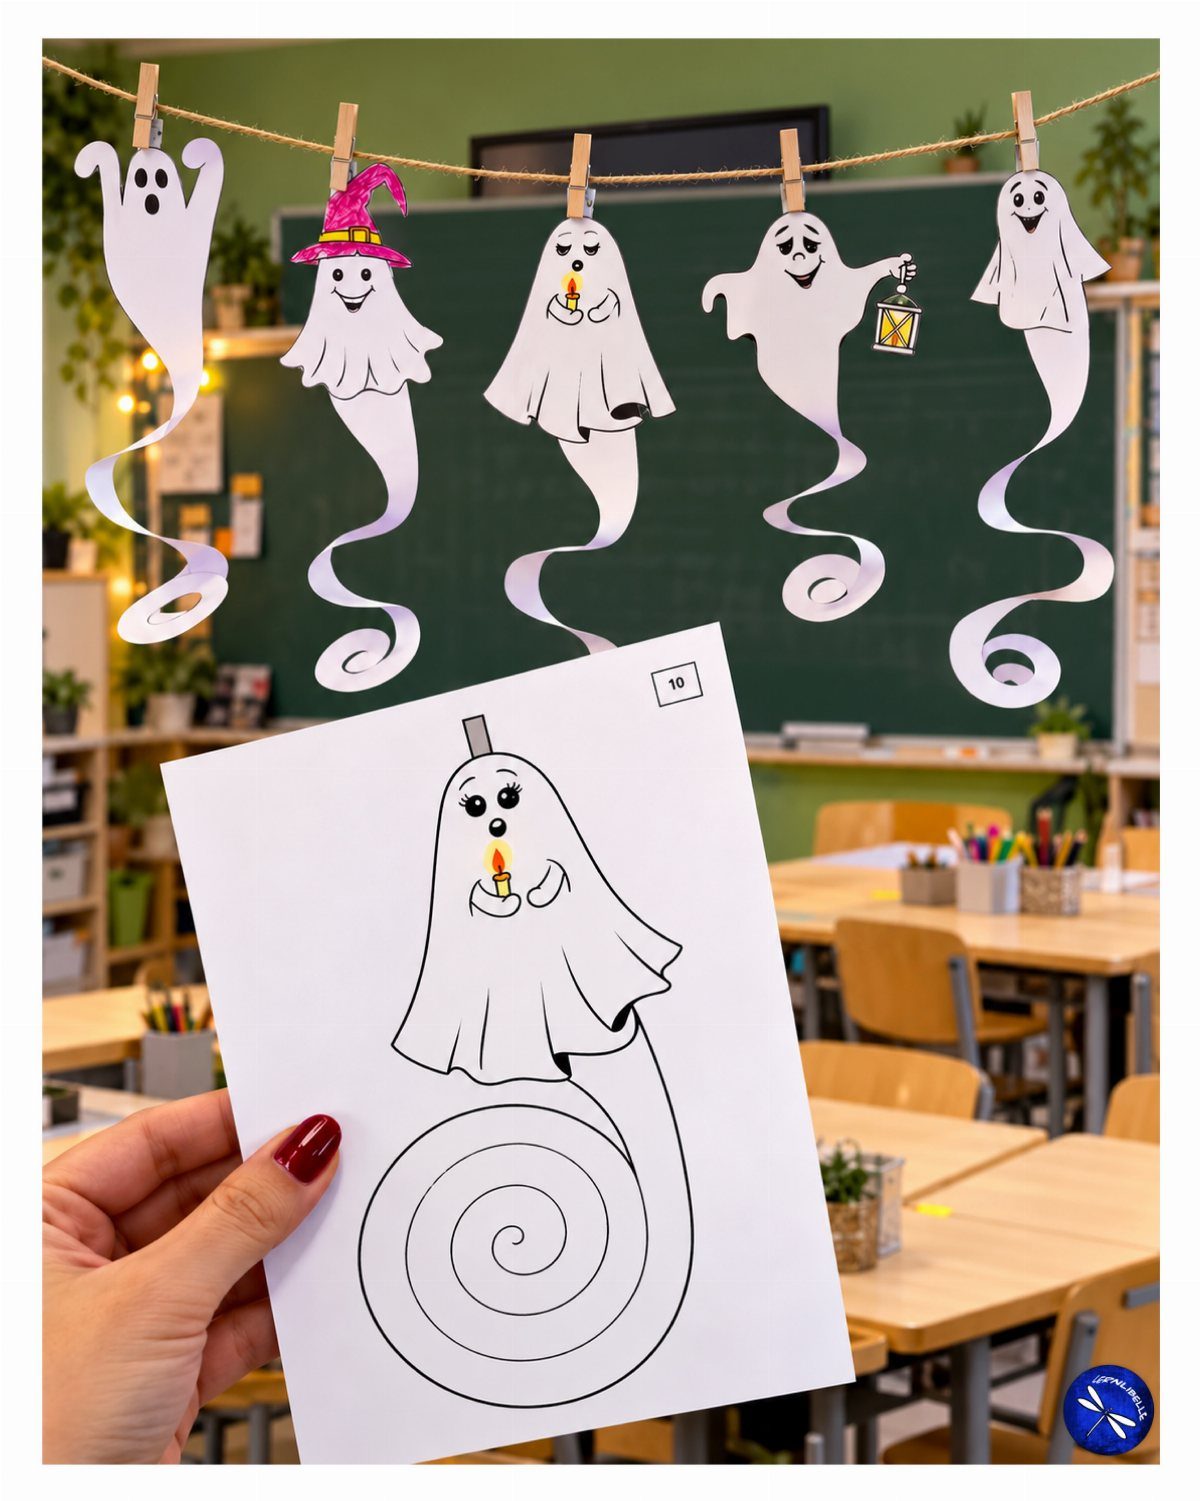
Draw one ghost, trace it to make as many copies as you need, and string the cutouts along a line so they hang in a row.
That’s the whole method, and it suits a class: every child can draw a ghost and add it to the line.
White paper on a dark chalkboard wall stands out best.
Hang them at different heights so the line has some motion. I’d keep the line short, around 5 ghosts, if you only have a little time.
6. 3D Decorations
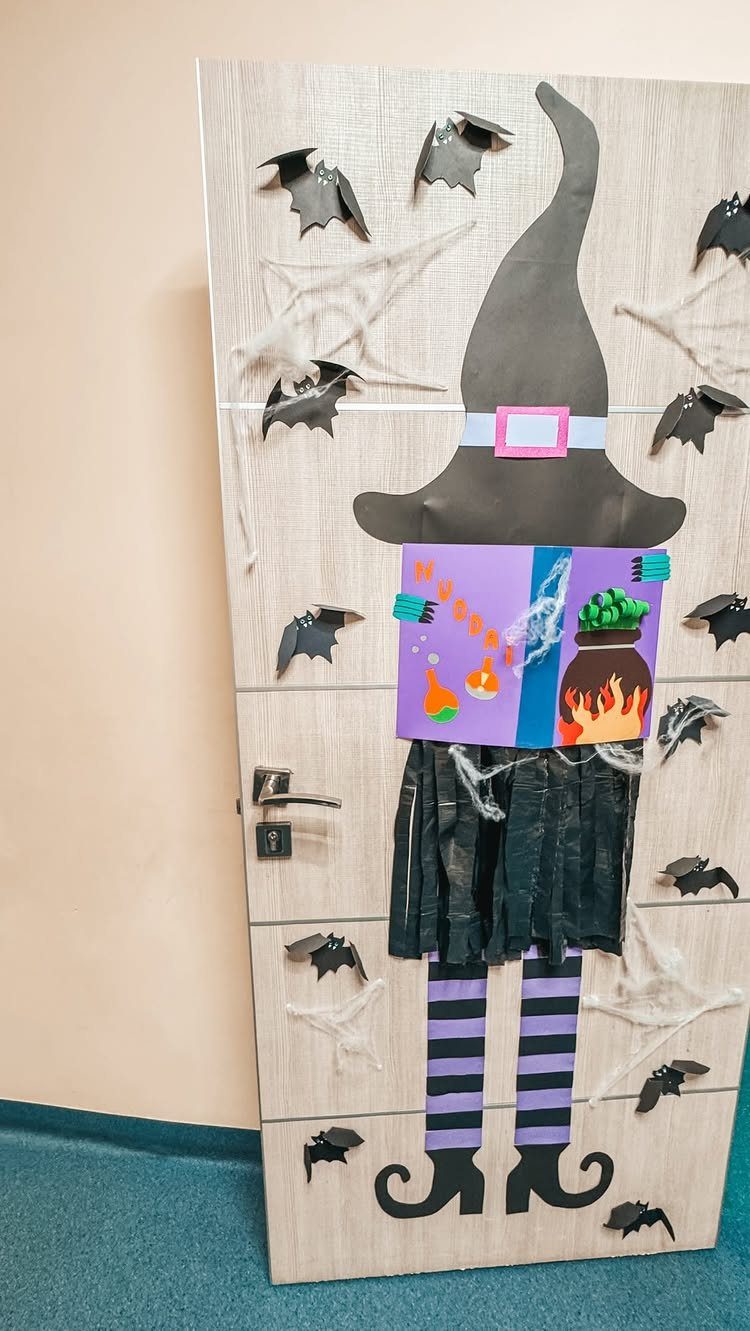
A life-size figure on the classroom door gets more attention than a dozen small decorations.
Surround it with paper bats and faux spiderwebs to fill the gaps.
Build the pieces flat from butcher paper, then tape them on. The cost is mostly paper and your time, so it suits teachers who like a project.
7. Halloween-themed Letters
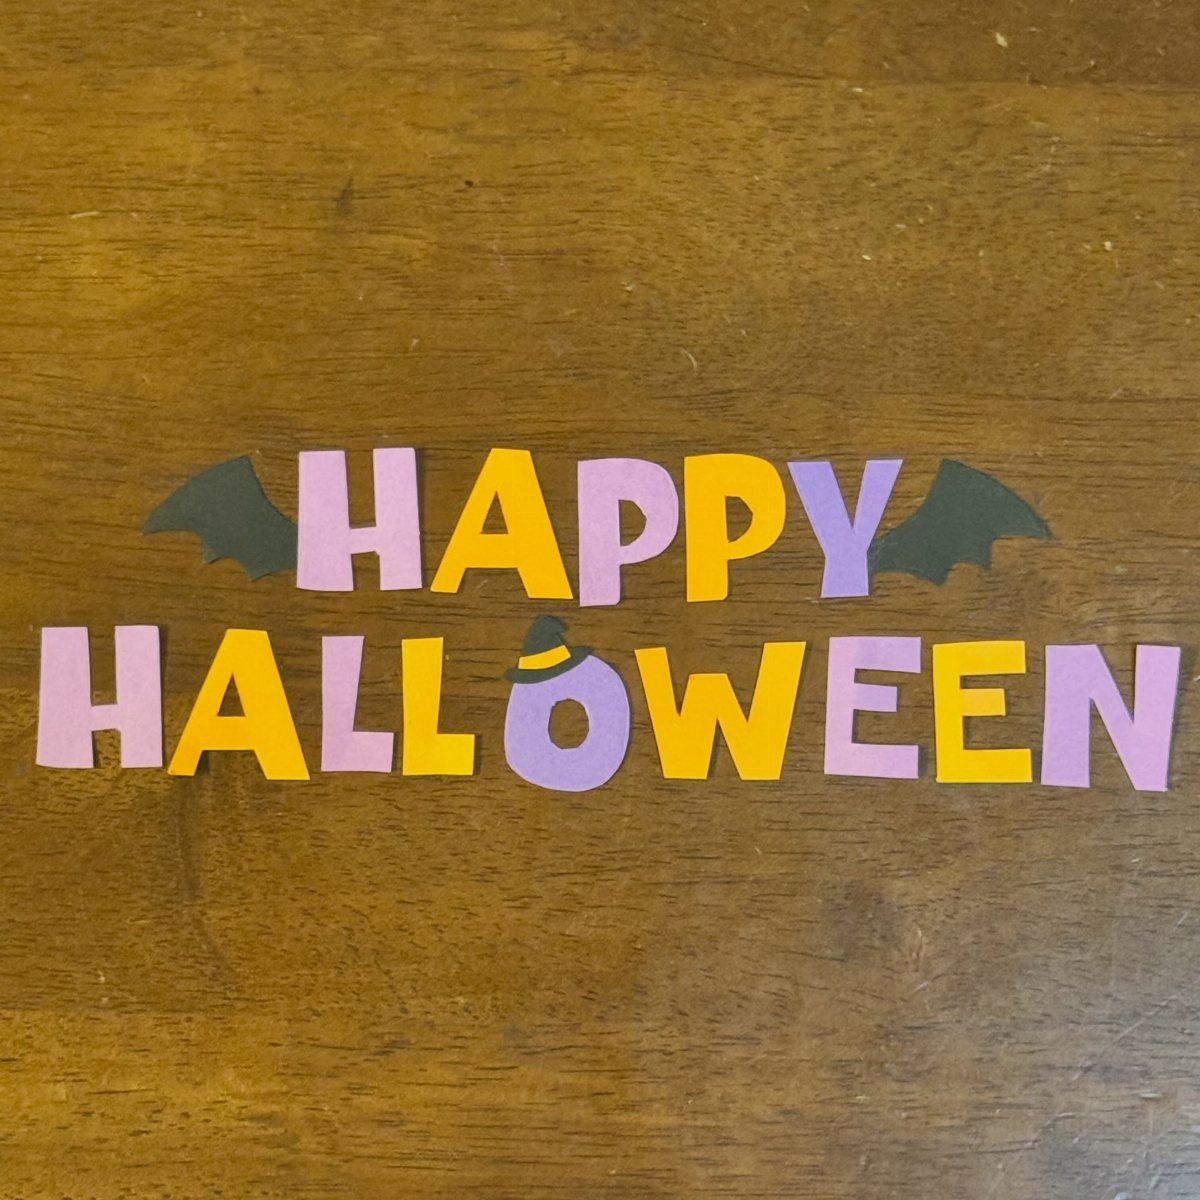
Paper letters spelling out the greeting give a room one clear message, and mixing purple and orange keeps it bright without any extra decorations.
Cut each letter from construction paper, one color per letter, so the words stay readable from anywhere in the classroom.
A tiny witch hat or a pair of black bat wings on a letter adds character for almost no cost. Set the row on a shelf or a table edge, where it needs no tape.
8. Halloween Bulletin Boards
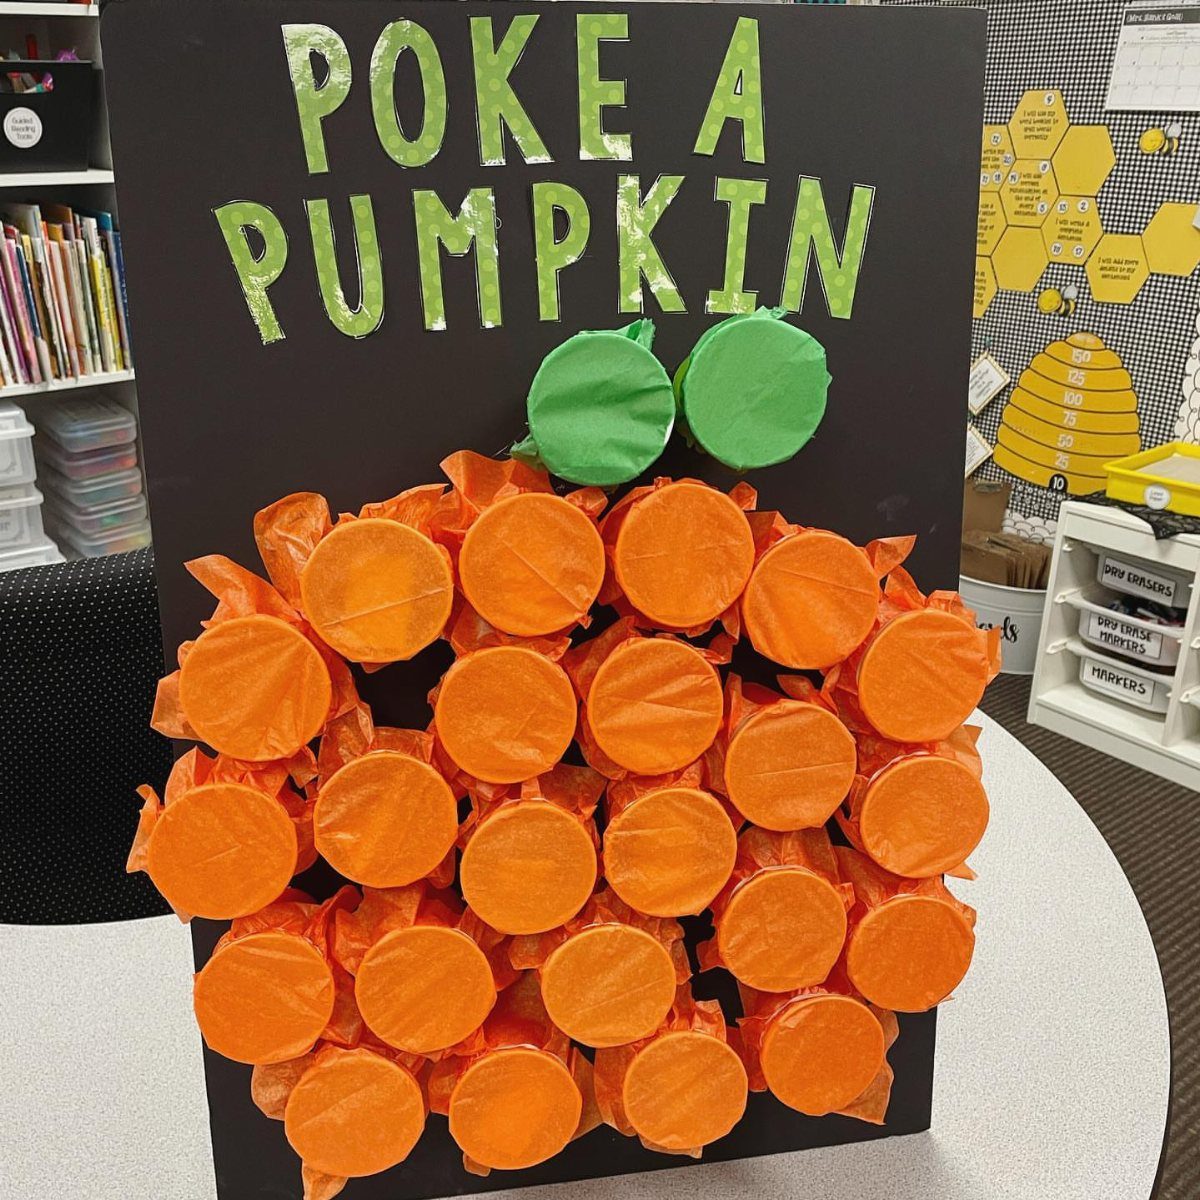
A black bulletin board makes a strong backdrop for a game, and "Poke a Pumpkin" is one that students can play.
Orange tissue paper cups arranged in a pumpkin shape give kids something to poke, so the board works as an activity and not just a decoration.
Cut the title letters from green paper so they stand out against the black. I prefer a board like this over a plain themed one, since students will actually use it.
9. Witch Themed Classroom Door
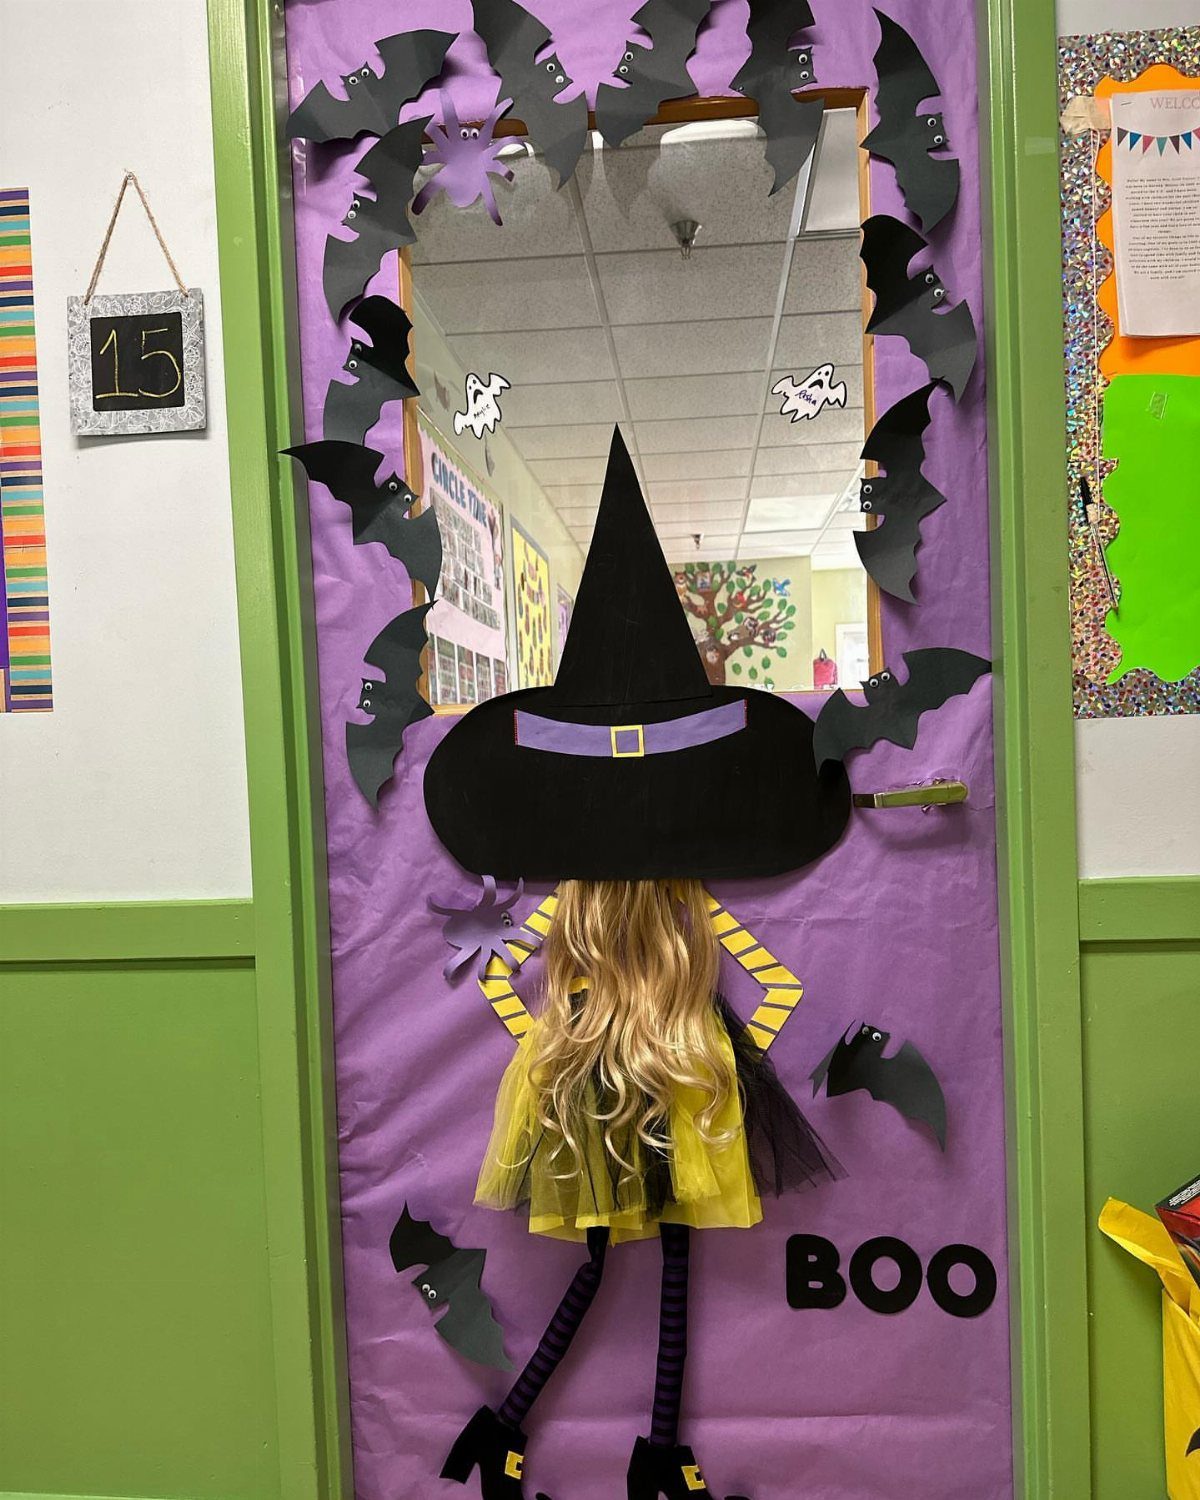
A big paper witch on a classroom door gets noticed from down the hall, especially against a purple background. Cut black bats to scatter around her and add a "BOO" in large letters so the message reads at a glance.
Draw the witch in sections on butcher paper, then tape the pieces together on the door. Keep the bats varied in size, since a mix looks like movement while identical ones look stamped.
10. Autumn and Halloween Door Decor
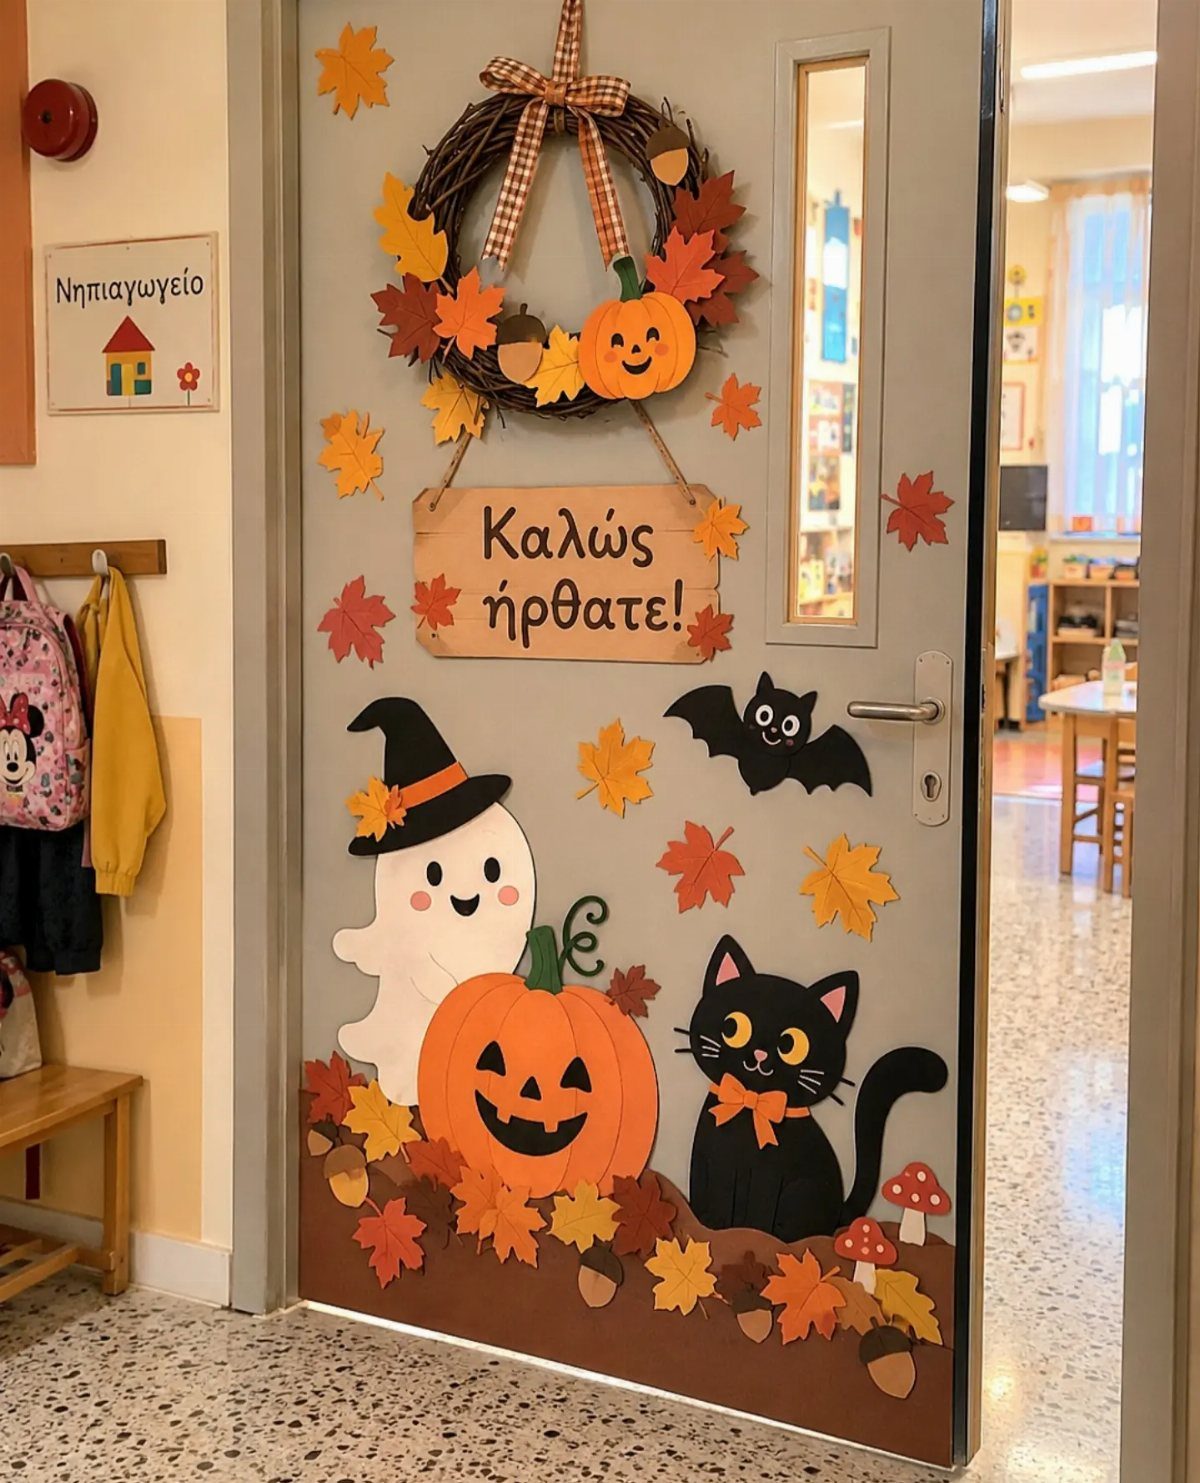
Fall leaves, a wreath and a few friendly Halloween characters let one door cover autumn and Halloween together. A paper pumpkin, a ghost in a hat and a black cat are all simple shapes that students can help cut out.
Because the leaves and wreath fit the season generally, the door can stay up past October 31 if you remove the ghost and cat. Add a welcome sign in the center to tie it together.
11. Paper Fan Wall Display
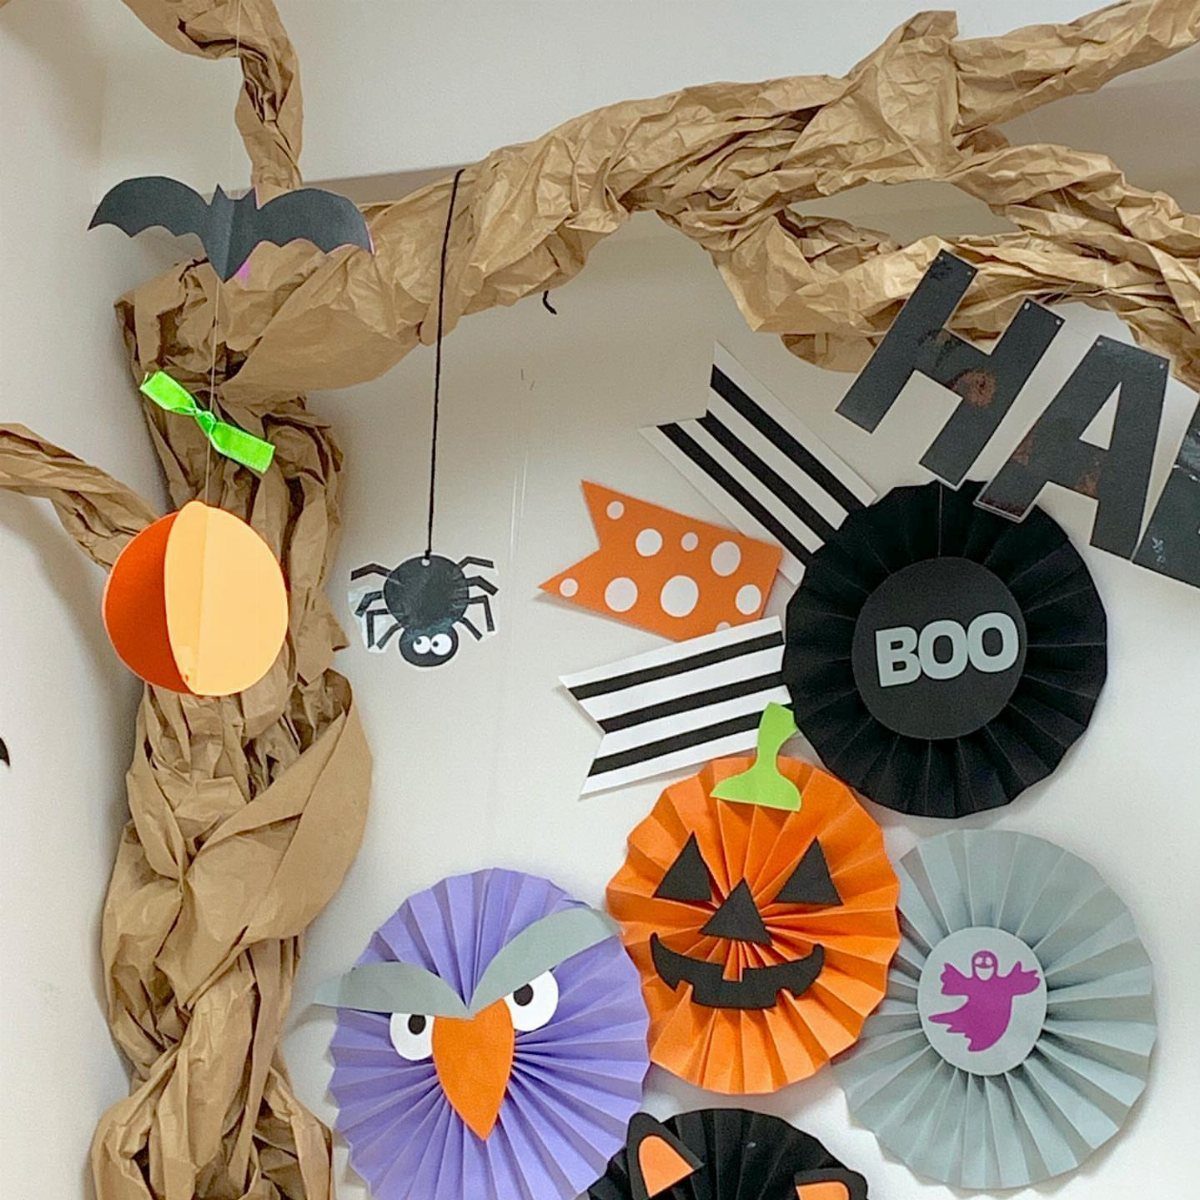
Paper fans folded into a pumpkin, an owl and a ghost turn flat paper into a wall display with real depth.
Pair them with a brown paper tree, a black bat and a spider, then add "BOO" and "HA" lettering for some humor.
Striped banners across the top frame the scene. Fold the fans from sturdy paper so the pleats hold their shape, and tape each one at the center point.
12. Creepy Circus Doorway Entrance
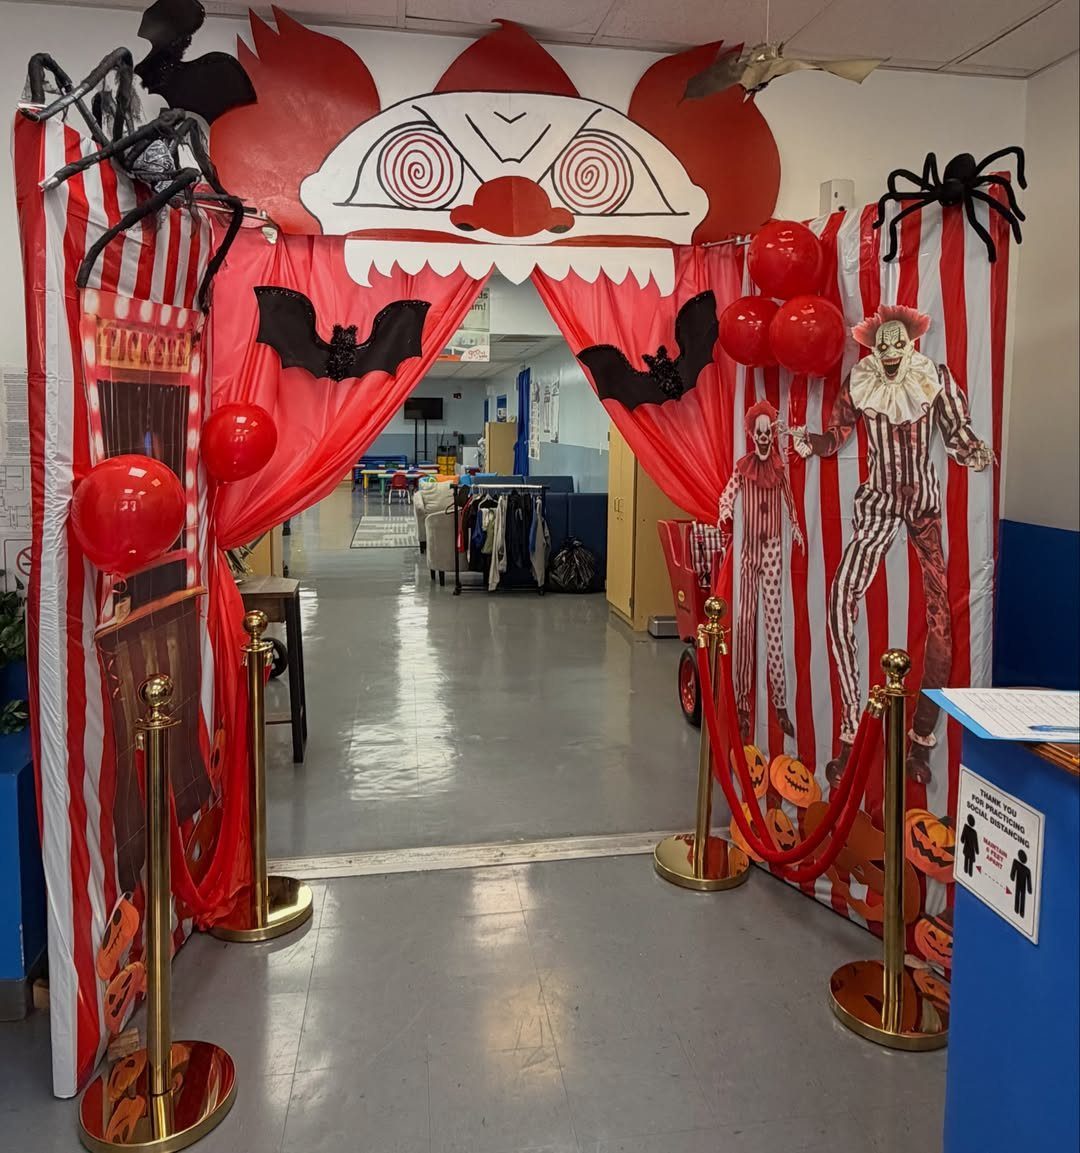
Red and white striped fabric hung across a doorway turns an ordinary entrance into a circus tent. Clown cutouts, red balloons, black bats and spiders add the creepy part, so students walk in under a spooky big top.
This creepy circus doorway costs more in effort than most doors here, but it makes the strongest first impression on a class.
13. String Wrapped Pumpkin Balloons
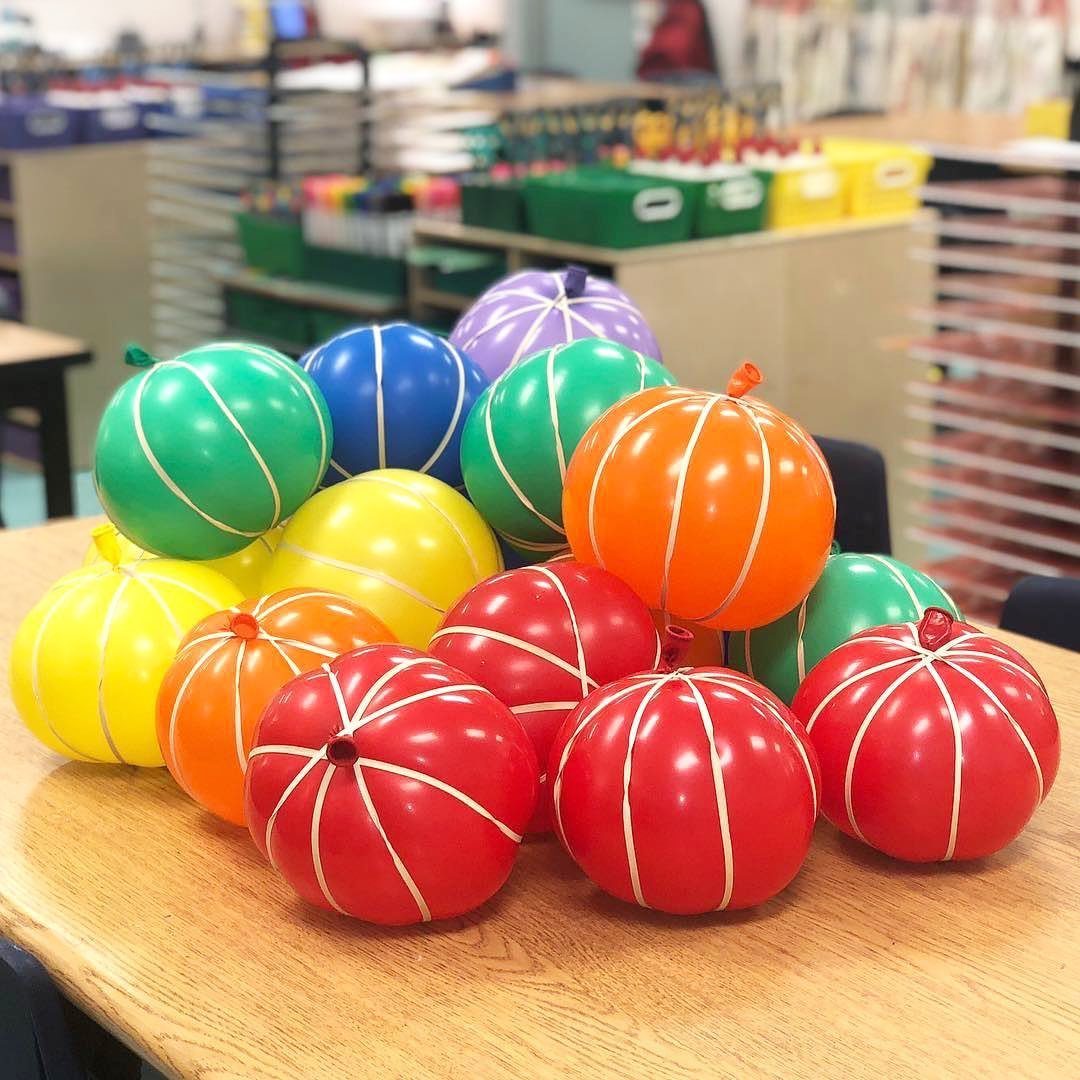
Balloons wrapped in white string read as pumpkins because the string pulls the surface into ribs, and the ribs are what make a round shape look like a gourd.
Any balloon color works, which means you can match the room instead of sticking to orange.
Soak the string in glue or paste so it stiffens, wind it around the inflated balloon, and let it dry fully; the balloon stays inside as the pumpkin form.
The result is hollow and light, and it costs little: balloons, string and glue.
Because they sit on their own, a cluster of these pumpkins looks right on a shelf or desk with no tape or tacks.
Budget-friendly Decorating Tips
Pick one or two areas of the room to decorate and leave the rest plain. One bold piece reads clearly from the back row, while a scatter of small ones gets lost, sometimes literally, in a busy classroom.
Check your own shelves before buying anything. Black, white and green pieces I already owned from other seasons, like farmhouse-style accents, worked as Halloween touches with no new spending.
If you do spend more, spend it on pieces you will pull out every October. A decoration used for years costs less per season than a cheap one you replace.
Engaging Students in Decorating
Hand students the work that shows up in the final display.
Hang the finished pumpkins as a bulletin board or a hallway display. Student work becomes the decoration, and kids notice when their own pumpkin is on the wall.
Making decorations is also a good moment to talk about where Halloween traditions came from. That turns a craft period into a short lesson, and it needs few supplies.
Digital Decoration Options
If cutting and gluing are not for you this year, a screen can carry the theme. Halloween daily agenda slides decorate the board instantly, with no stapler involved.
Look for slides that include a spooky attendance question and a spot for the warm-up or Do Now. Each slide then does a job and sets the mood at once.
I would treat this as a base layer, not a replacement. Digital slides cover a busy week well, and one or two paper pieces can still sit on the walls.