Ideas here run from a free leaf-and-branch display to a light-up atom model with LEDs, and from a single bulletin board of student work to a periodic table that fills a whole wall.
What picks yours is how much of the room the students will build: if they can draw, cut or write, choose the anchor charts, the ocean wall or the vocabulary tree, and if the wall has to stay ready for display without constant upkeep, go with the periodic table display or the wall letters and banners.
Even the last section says to leave some space blank on day 1.
1. Student Work Bulletin Board
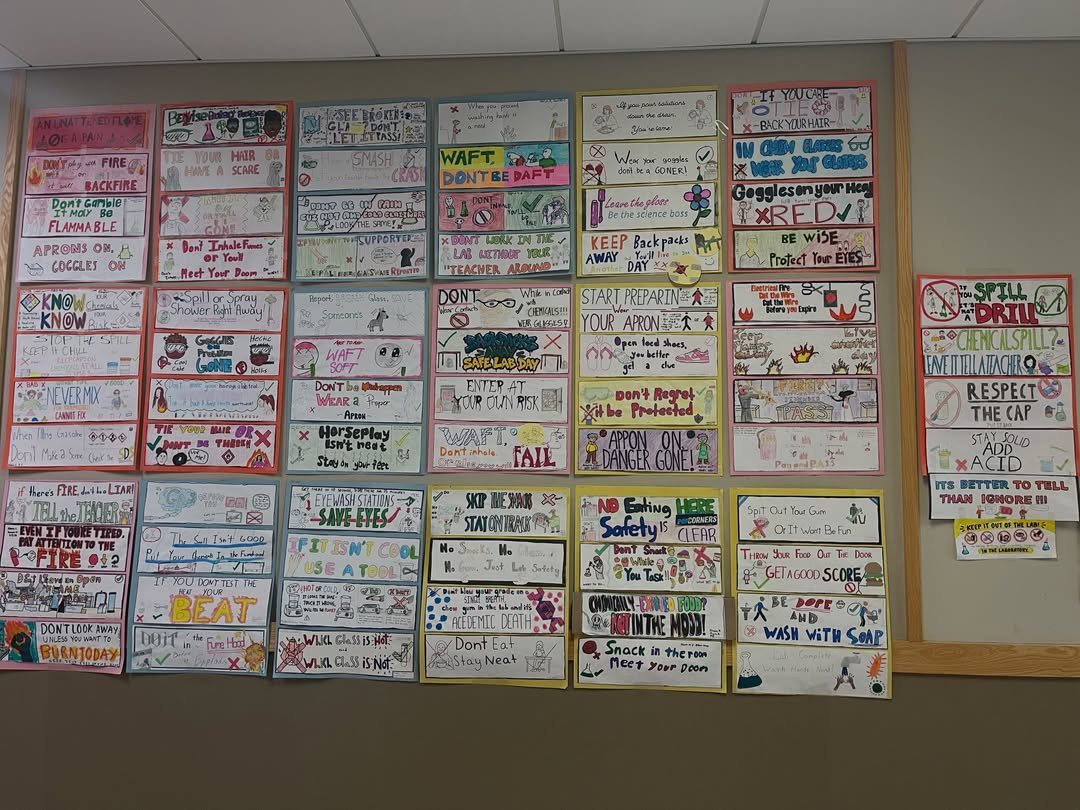
A grid of student-drawn posters works because every kid gets a square of wall. Pick one narrow topic, like the lab safety rules here, so the drawings read as a set and not a pile.
Give everyone the same paper size and a short caption of 1–3 words.
Matching sizes make the grid look planned, and tight spacing between sheets keeps it neat. I would hang them at student eye level so kids actually read each other’s work.
2. Anchor Charts
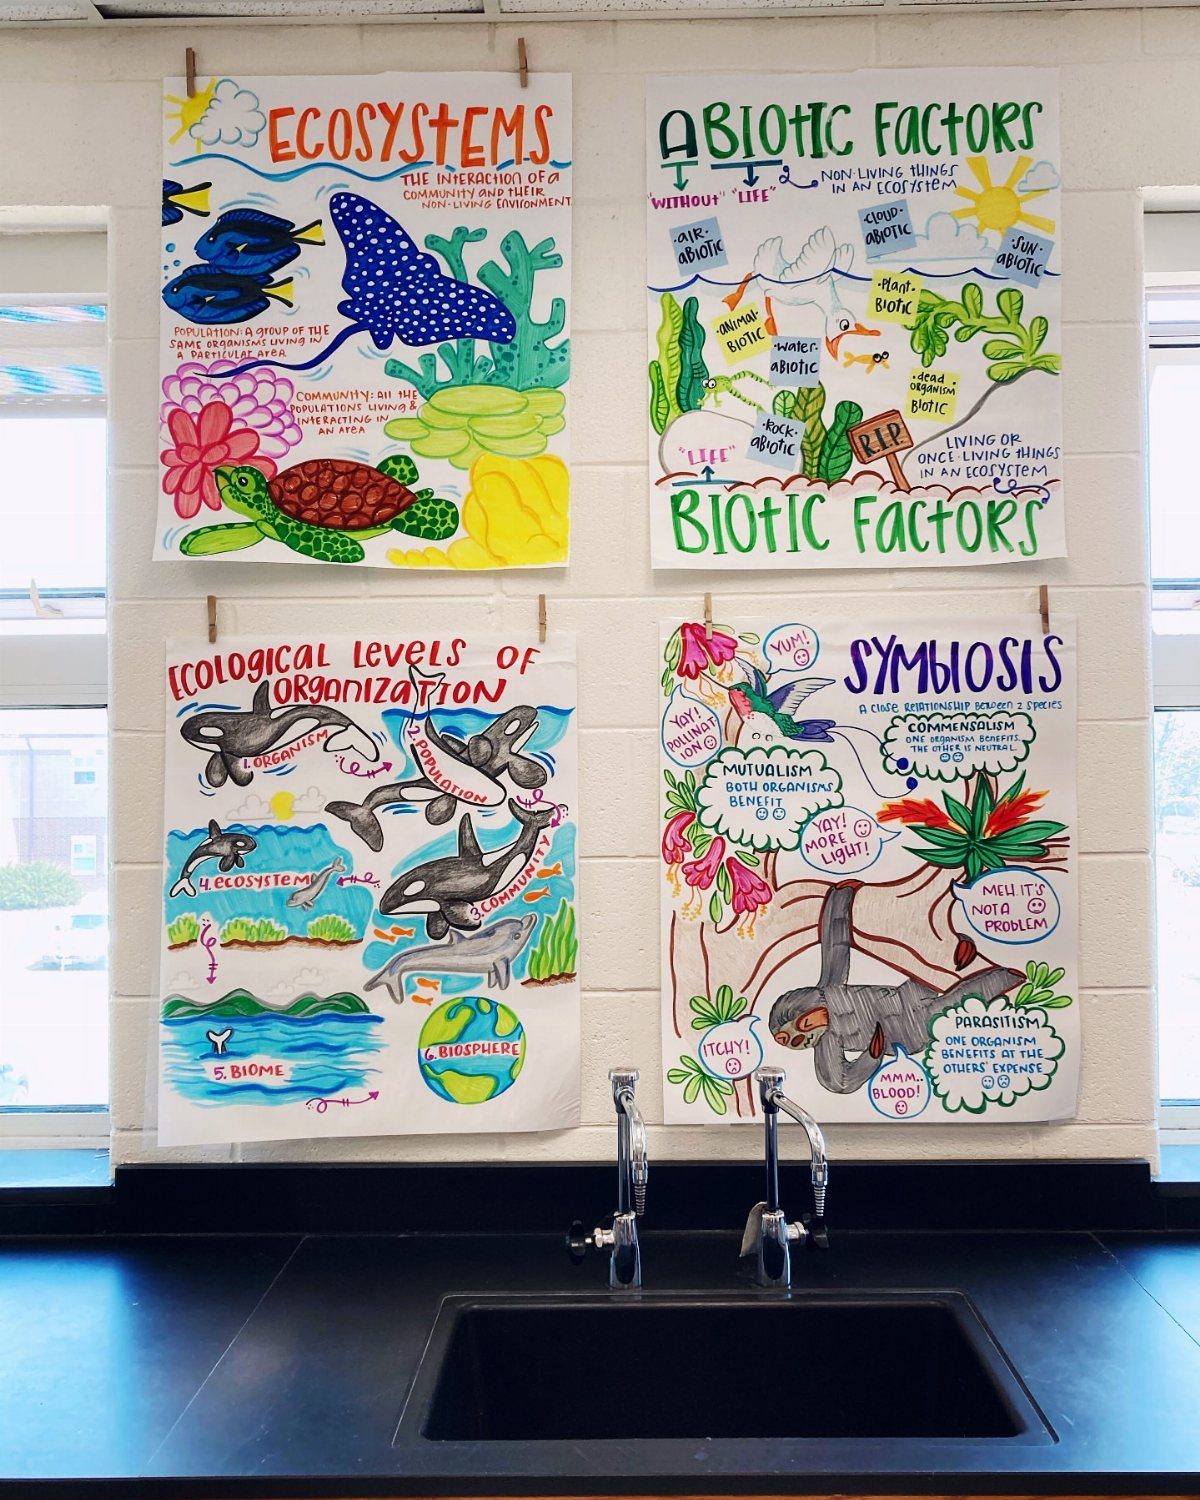
Anchor charts earn their wall space when students help draw them. A chart on symbiosis or ecological levels sticks better when the class argued over where each label went.
Keep the topic count small, because four charts in a row, as on this wall, read clearly while twelve become wallpaper. Draw in pencil first, then trace in marker so the text stays readable from the back row.
Color coding helps: one marker color per sub-idea.
3. Leaves and Branches Decor
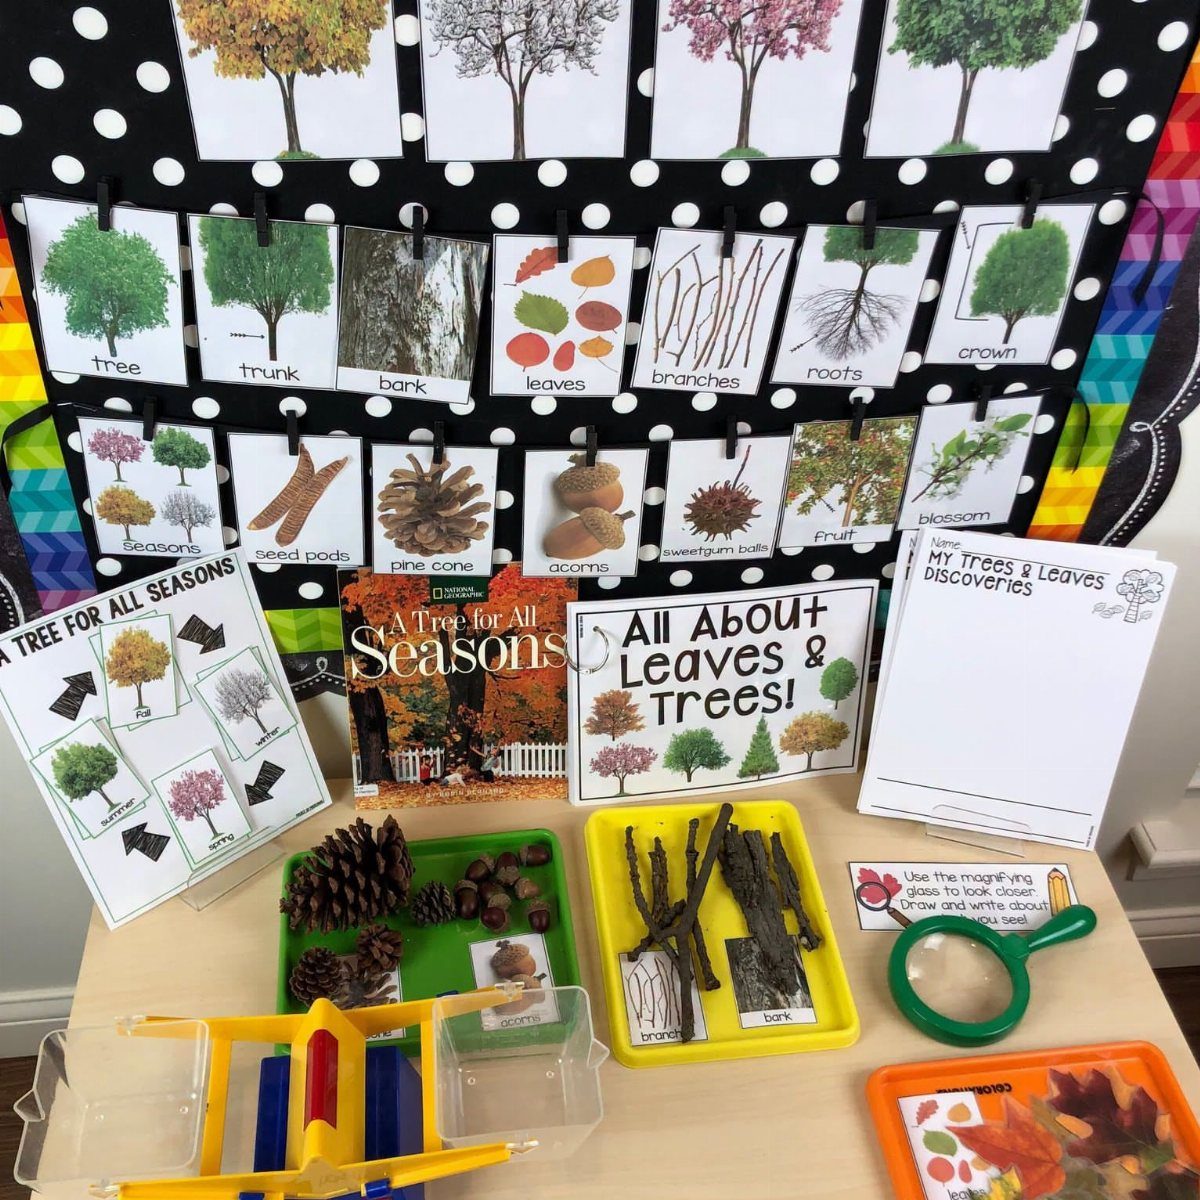
Real pinecones, acorns and branches in shallow trays turn a table into a touch-and-look station, and they cost almost nothing if you gather them yourself.
Pair the specimens with a magnifying glass and a book so kids have a reason to pick things up.
Trays keep the mess contained and let you swap items by season. I like adding printed labels with the diagrams, so each specimen has a name students can match.
Skip anything that sheds heavily or could crumble into a pile.
4. Periodic Table Display
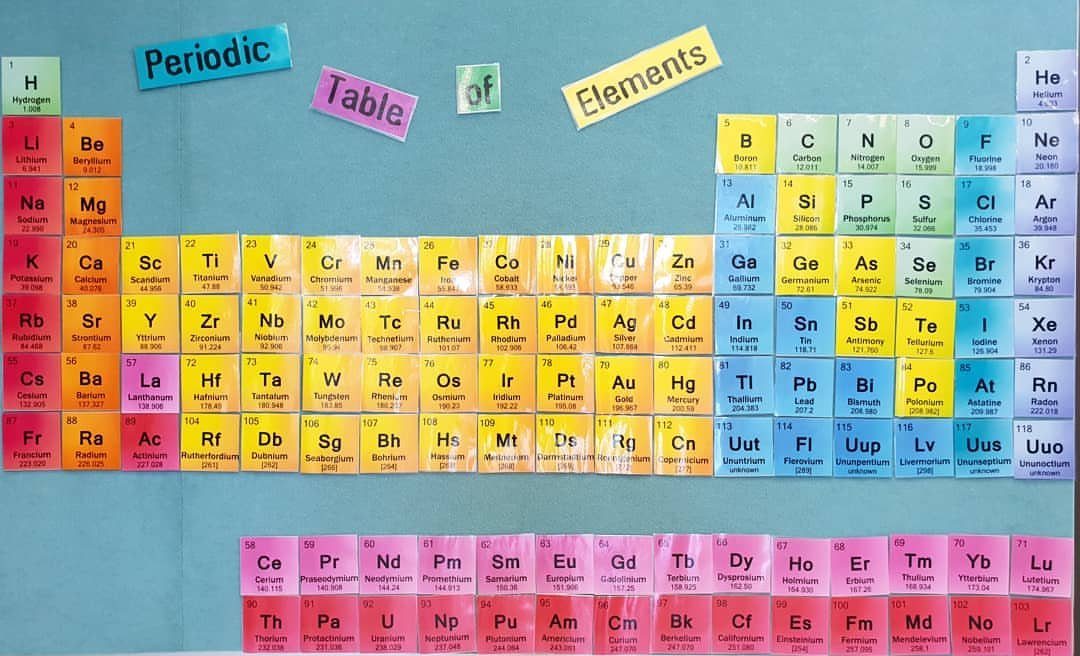
A periodic table built from paper squares can fill a whole wall, and the size is the draw. Color the squares by element group so the layout teaches the pattern before anyone reads a symbol.
Cut every card to the same size and lay the grid out on the floor first, then hang it from the top row down.
A bold title across the top, like the one here, tells students what they are looking at.
Cards can be reused year after year, so I would laminate them.
5. Materials Properties Interactive Board
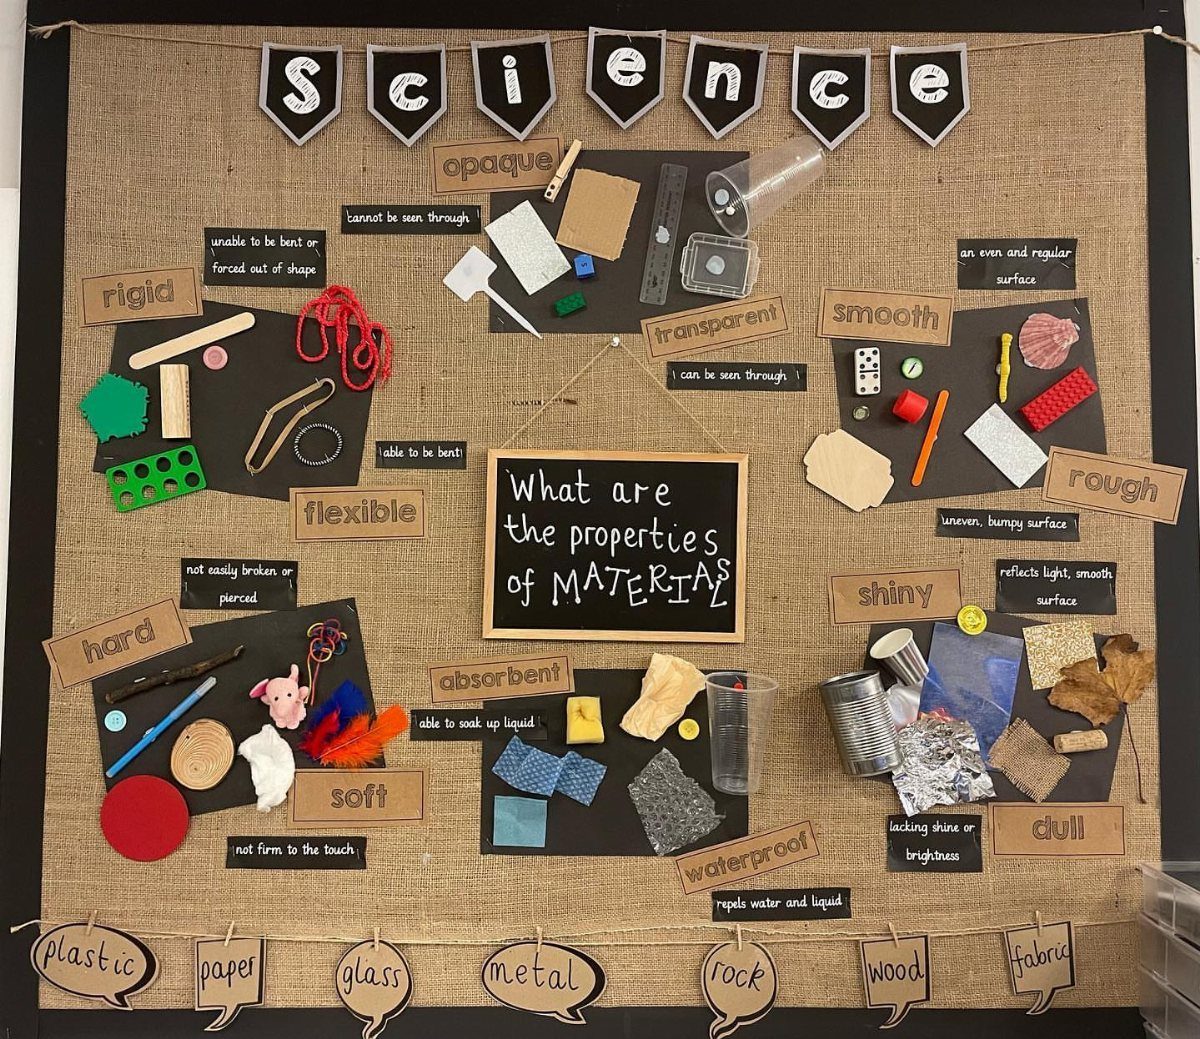
Real samples beat printed pictures on a properties board. Students can press a piece of plastic, hold a scrap of fabric to the light, and decide for themselves what counts as flexible or opaque.
Tape or glue each sample firmly and put its property word right beside it. Burlap makes a good backdrop because it grips pins and staples and adds texture without competing with the samples.
6. Light-Up 3D Atom Model
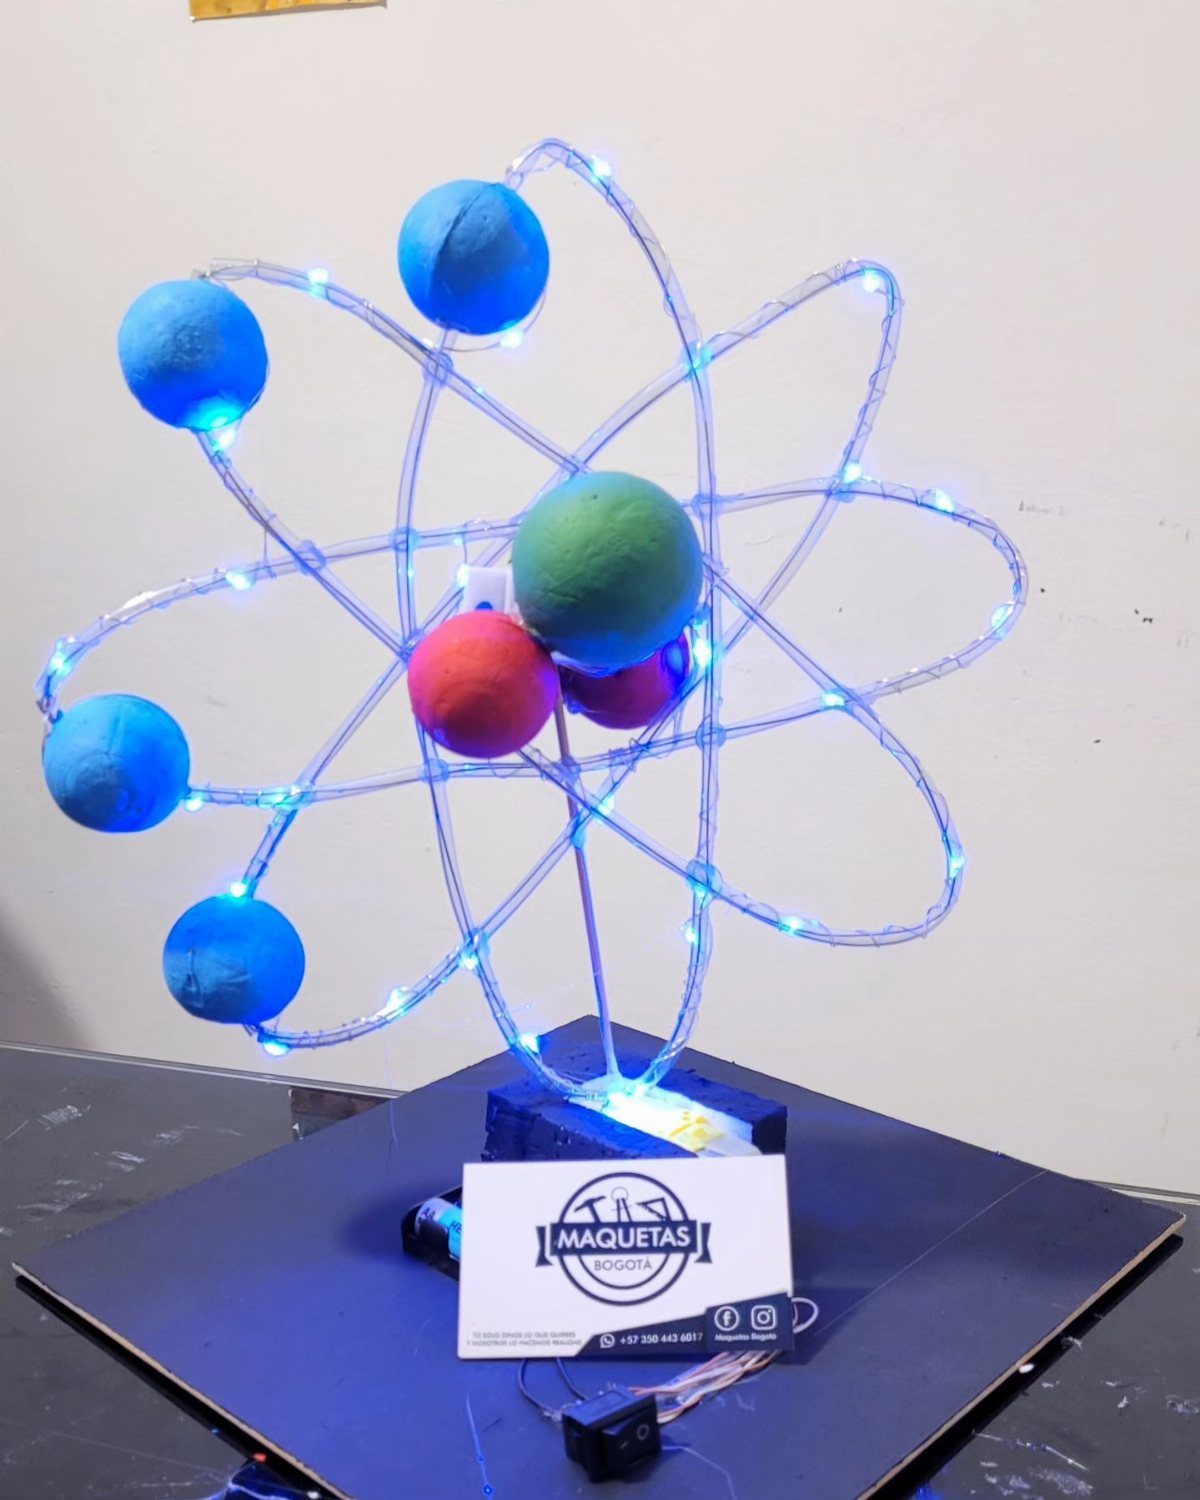
A light-up atom model gives the room a focal point that kids will crowd around. Spheres in different colors separate protons, neutrons and electrons, and LEDs on a dark base make the nucleus glow.
Battery-powered LEDs are the easy route, since they avoid cords across the floor. I would build the sphere layout around one simple element, like carbon or helium, so the count of particles can be checked at a glance.
Keep it on a shelf or counter away from curious hands.
7. Science Wall Letters and Banners
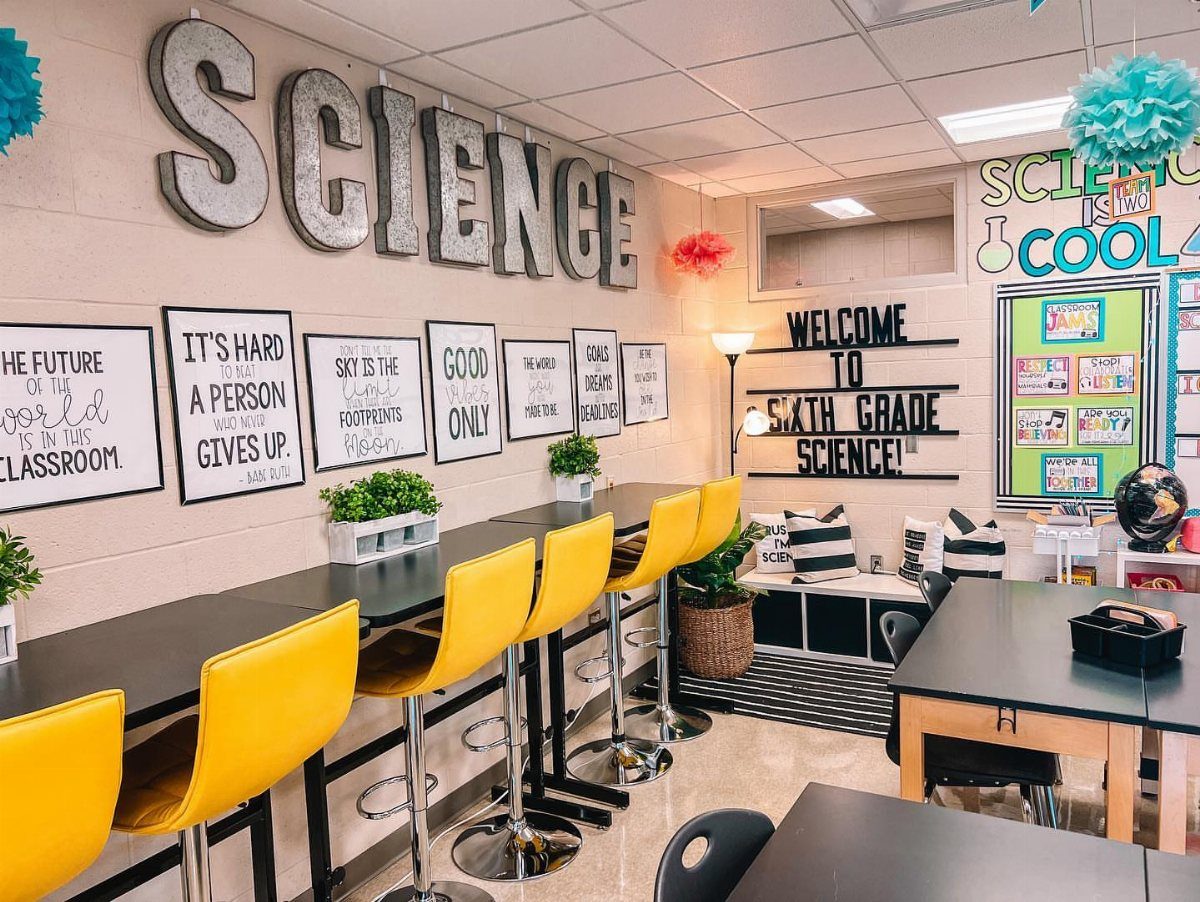
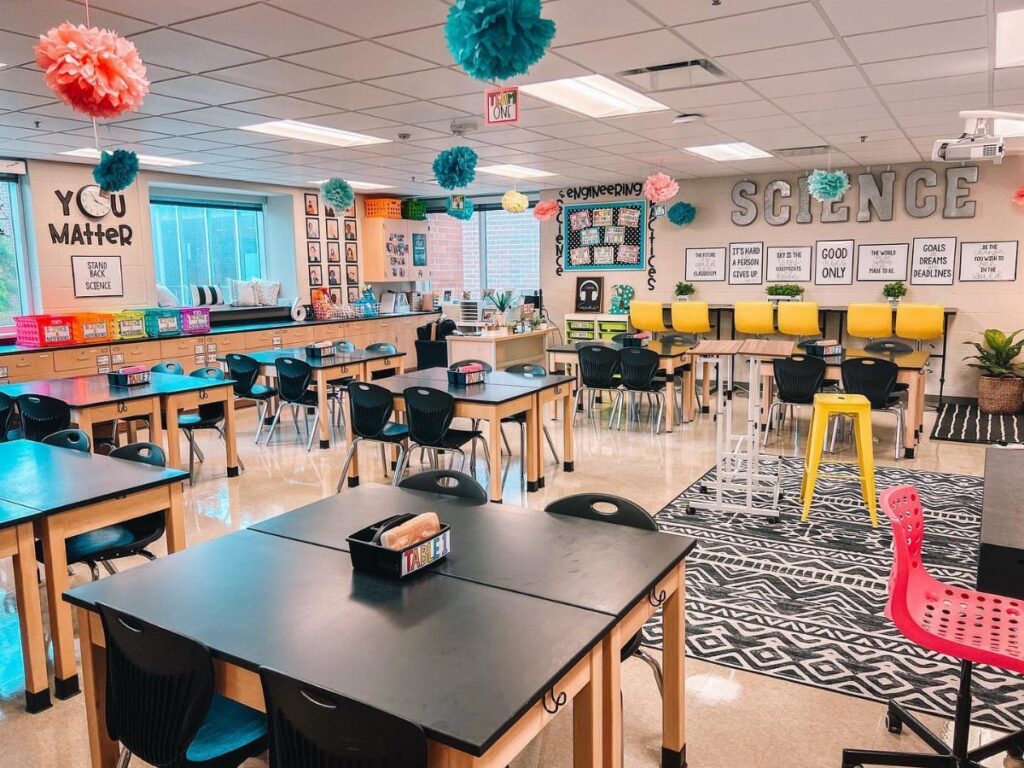
Big dimensional letters spelling out the subject over a doorway or whiteboard tell students what room they are in before anyone speaks. Silver reads as lab-clean, and it pairs well with bright stools, as the yellow ones do here.
Mount the letters at one height and space them evenly, so the word reads as one line. A welcome banner with the grade level, like the sixth grade one here, gives the first day a clear greeting.
Add quote signs sparingly, two or three, so the wall stays readable.
8. Underwater Ocean Wall Display
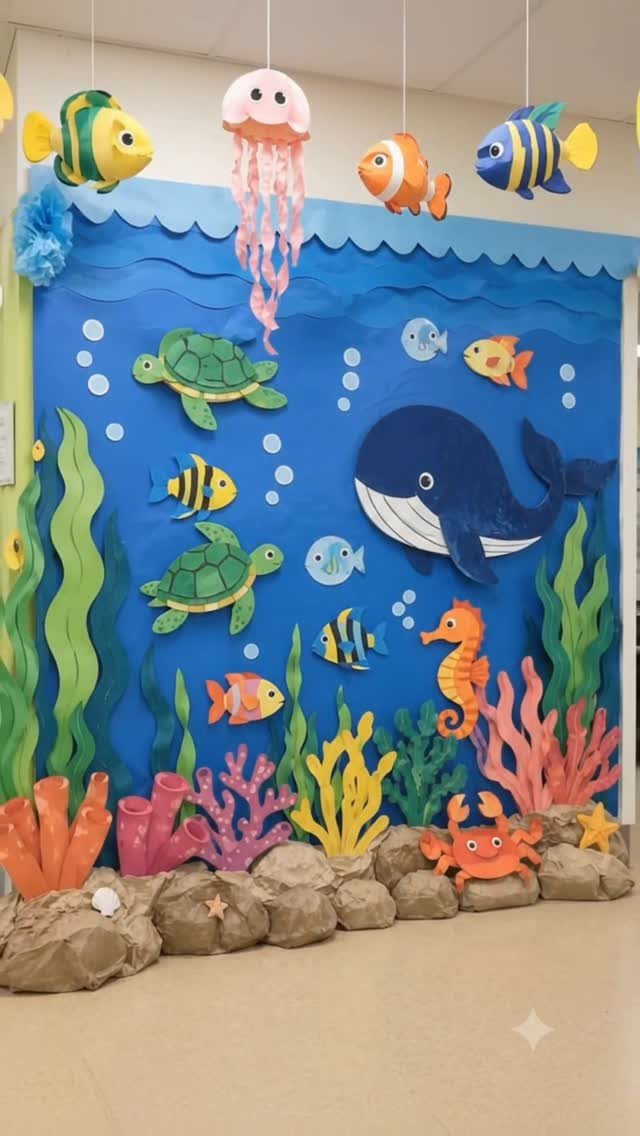
An ocean wall works because blue paper makes a whole habitat out of simple cutouts. A big whale anchors the scene, and smaller turtles, fish and paper coral fill in around it.
Layer the pieces so some overlap; flat, spaced-out shapes look like stickers. Then hang 3D fish and a jellyfish from the ceiling, which pulls the display off the wall and into the room.
I would cut the creatures from construction paper, since it is cheap and students can help.
9. Science Vocabulary Tree Poster
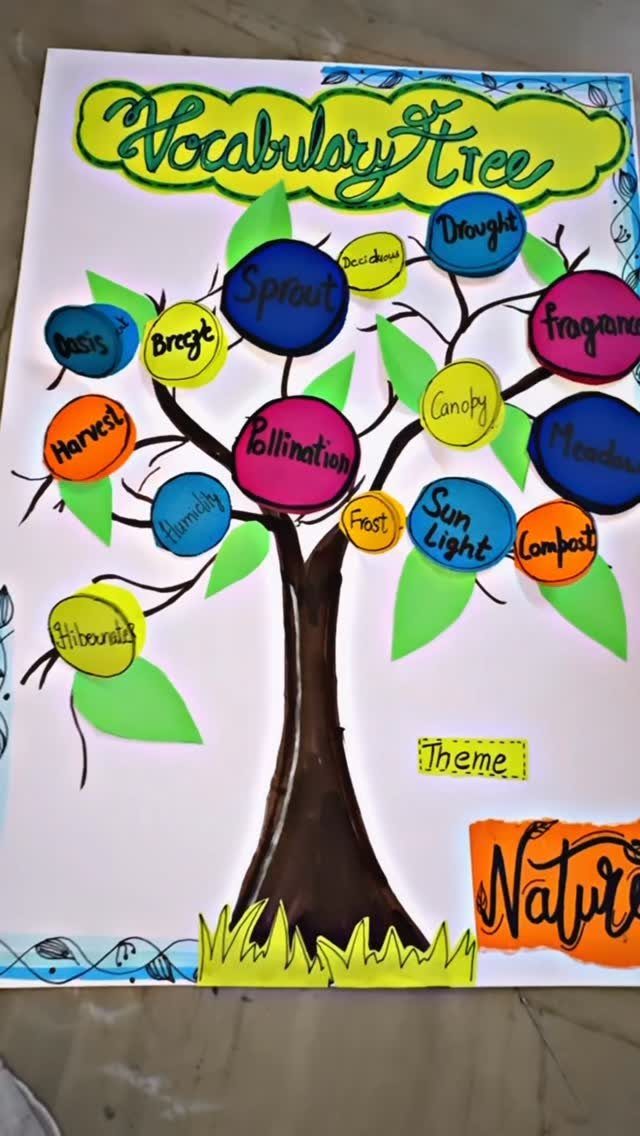
A vocabulary tree gives new words a home that grows. Paint the trunk and branches on poster board, then write each term inside its own colorful circle, like Pollination, Sprout and Drought.
Choose one theme for the title, as "Nature" does here, so the words belong together. Use removable circles or sticky tabs, so students can add a word when a unit introduces it.
Write in thick marker; thin pen disappears from across the room.
10. Fairy Light Paper Tree and Beehive
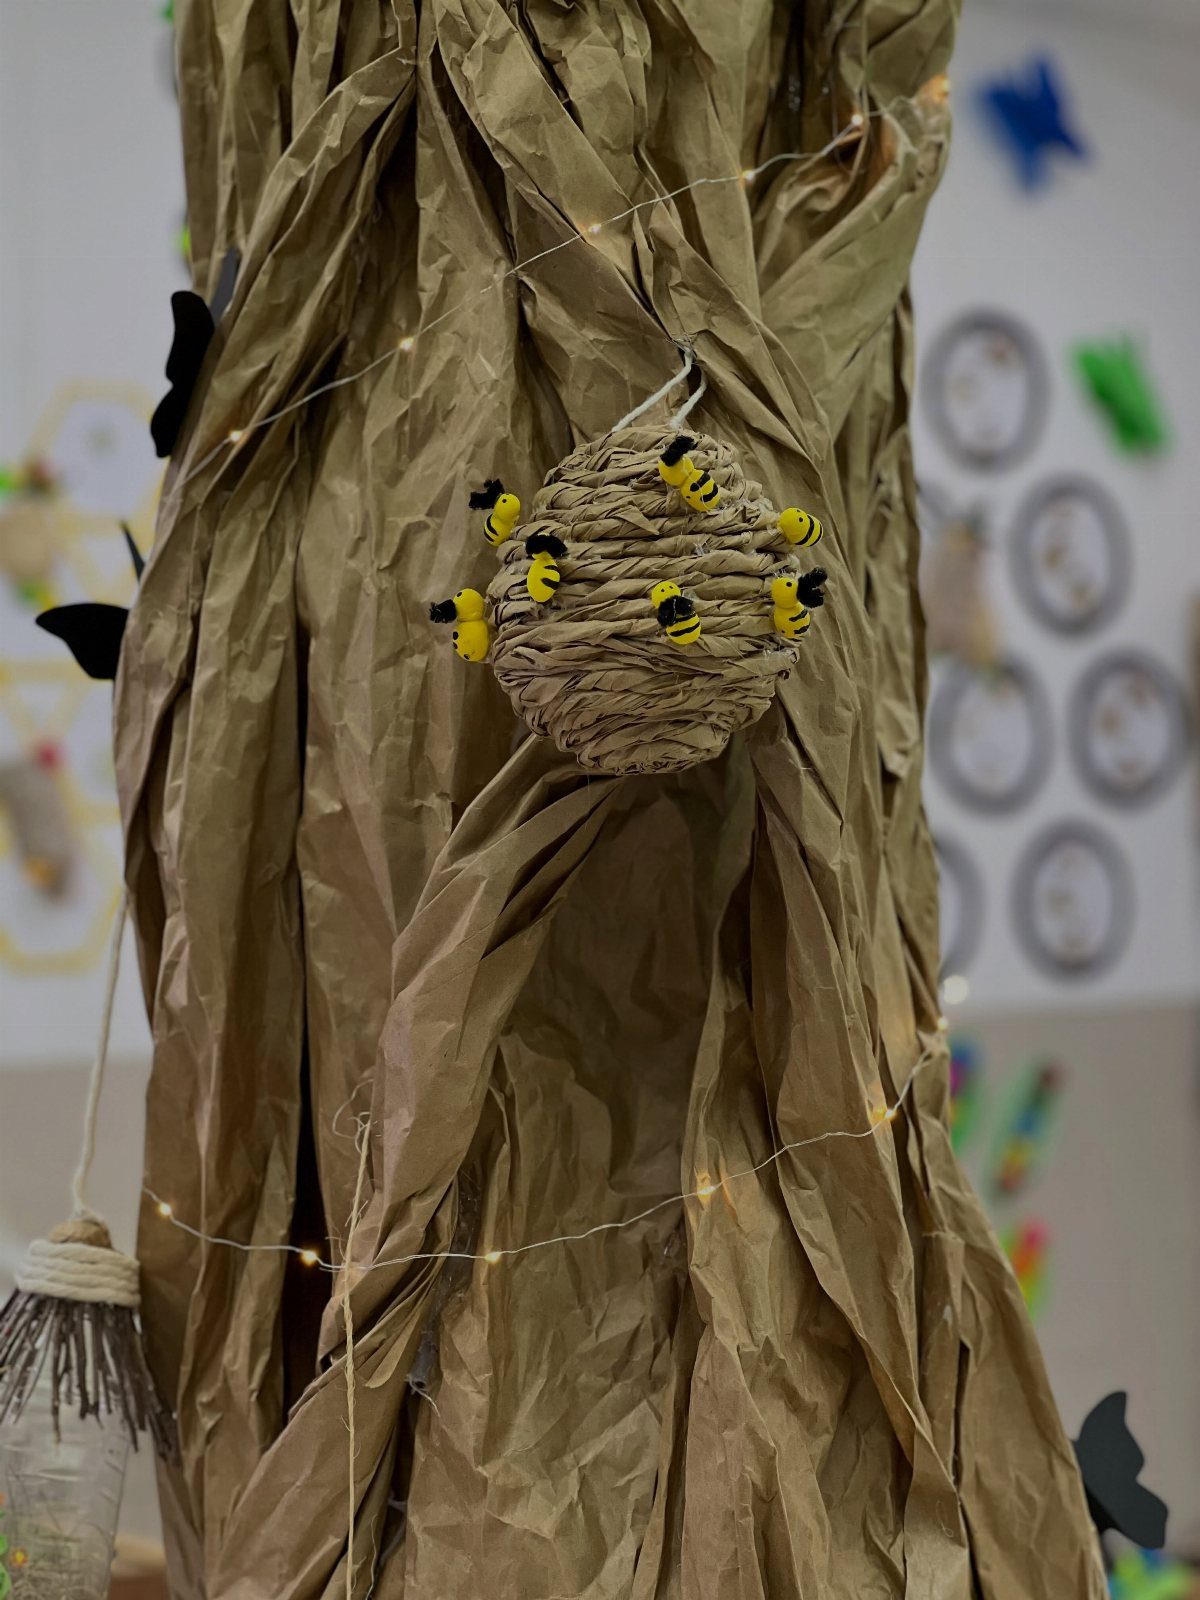
Brown textured paper makes a convincing tree trunk with no painting, and fairy lights wound around it add a soft glow to a reading corner. Crumple the paper first, then flatten it, so the bark looks rough.
A small paper beehive and a handful of tiny yellow and black bees give the tree a story, and students can build the bees themselves. Use battery-powered lights, which keep cords off the floor.
Tape the trunk firmly at the top and bottom so it stays upright.
11. Marie Curie Radiation Cylinder Display
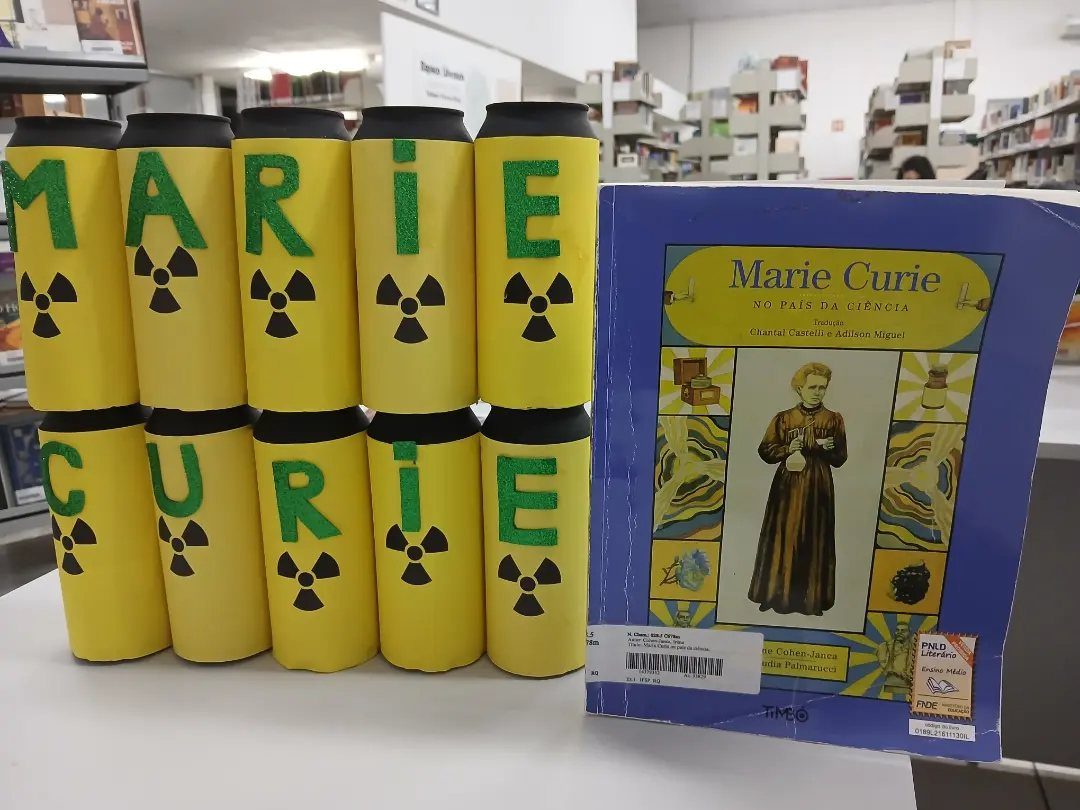
Yellow cylinders stamped with radiation symbols can spell out a scientist’s name, and the effect is bold: hazard-sign yellow plus green letters reads as science from across the room.
Marie Curie suits it because the symbol ties straight to her work.
Set a biography beside the cylinders so students have somewhere to go next. A white table or shelf keeps the color from clashing.
Swap the name for another scientist each month, and the display earns its spot all year.
Creating a Welcoming Environment
Science rooms come with hard, sterile surfaces, so the first fix is lighting. Switch off the overheads on ordinary days and use lamps or other soft light, then bring the brights back up for labs and dissections.
Scent works too. Keep it mild, since some students are sensitive to fragrance, and skip it if anyone in the room reacts.
Clutter undoes all of this. Give every item a set home, and dedicate one section of the room to student supplies so kids know where things are and can reach them without asking.
Budget-Friendly Decor
You spend a long day in this room, so decorate it for yourself first. A teacher who feels relaxed in the space helps the students feel the same.
For a calm base, neutral boho tones are easy on the eye and blend with whatever you already own. Pink is a good accent, and both can still point toward science and student motivation.
Near the door or on a bulletin board, set up a student information station. Kids can check it on their own, which saves you repeating the same answers.
Involving Students
Leave some wall space blank at the start. Not every board needs to be filled on day 1, and empty space is room for work students will make.
Set aside one wall or board just for their work. Seeing it hang there lifts morale and tells kids they have a place in the classroom community, and it costs almost nothing.
Give each student their own square on a dedicated board and let them pin up work they want to show off.
Letting them pick matters, because a student who chose the piece cares about seeing it displayed. Elementary and middle school students especially love watching their work become part of the room.